To Upload Content:
From the web dashboard, click on the + Create where you will have the choice to create a Single Post, Placeholder, or Bulk Create.
For Single posts:
- Click on the New Post option
- From here, you can begin uploading and planning content for 1 post
For Bulk posting:
- Click on the Bulk Create option
- From here you can upload media for multiple posts with customization applied to each post or individually edited. Below are the steps for customization:
- Select the Social Channels

-
- Upload your Media

-
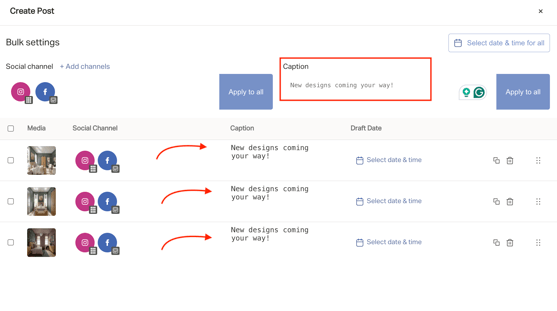
- At this point, you have the option to select the Date/Time for ALL or edit for each post.


-
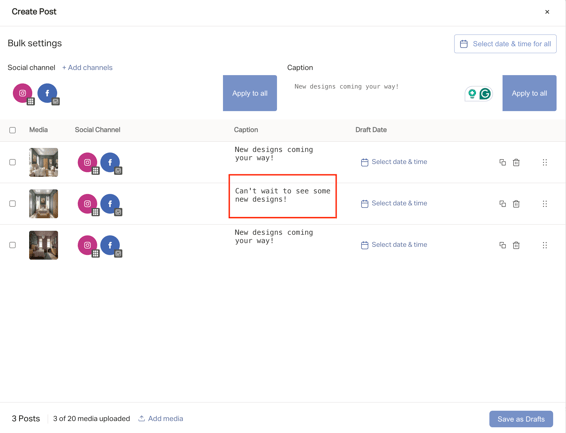
- You also have the option to add a Caption for ALL or Edit for each post
- You also have the option to add a Caption for ALL or Edit for each post
-
- You can also move posts around, delete or duplicate by using the icons to the right of each line
- Once your content has been created and scheduled, click Save as Drafts
- You will be directed back to your grid, and from there you will see the individual posts

Please Note: These posts are still in draft form. To schedule them, you will need to open the post from your drafts and click Schedule.
To Merge Bulk Uploads into a Carousel:
- Click on the Bulk Create option
- Upload your media
- Click the check boxes for the media you want to merge
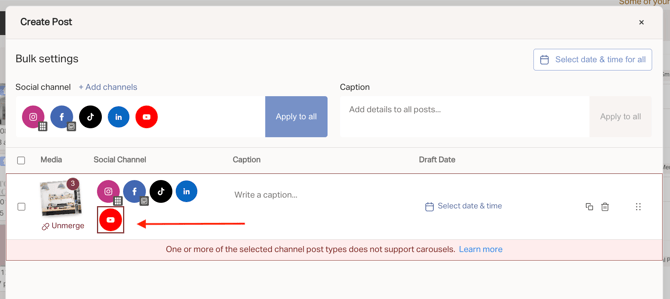
- Select Merge into Carousel:

When trying to merge media into a carousel, if you have a social channel selected that does not support the media type (example: single image for YouTube), you will see a red error message alerting to the social channel that needs to be unselected:
You'll be able to upload content from:
- Your Computer
- Your Media Library
- Dropbox
- Google Drive
- Canva
From the mobile app, click on the "+" at the bottom of your screen to begin uploading and planning content. You'll be able to upload content from your mobile device.

Please note: Bulk Upload is not available on the mobile app at this time.