
Pushing a Post from Social Planner to Your Creator Store
Here's how to feature a post on your Creator Store every time you schedule from Social Planner.
Step 1: From Social Planner, make sure you're in the correct workspace. You can switch workspaces using the dropdown in the top left corner.
Step 2: Tap + Create Post.
Step 3: Select Instagram as your channel and choose your post type (Post/Reel).
Step 4: Upload your media and fill in all post details — caption, hashtags, location, and any other relevant fields.
Step 5: Tap the Creator Store icon in the toolbar below your caption (it looks like a storefront grid icon).
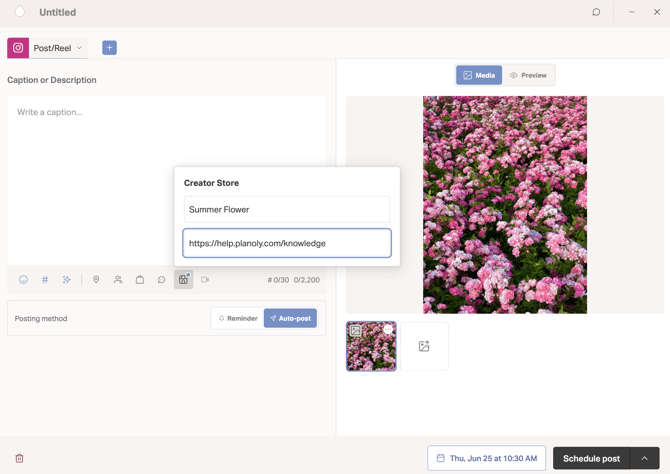
Step 6: A Creator Store panel will appear. Fill in the following:
- Title — This is metadata used for SEO and won't display publicly on your store.
- URL (optional) — Add a destination link you'd like to drive traffic to, such as a product page, blog post, or booking link.
Step 7: Make sure your Posting method is set to Auto-post so the post publishes automatically and syncs to your Creator Store.
Step 8: Tap Pick a time, select your desired date and time, then hit Schedule post.
That's it! Once your post goes live, it will automatically appear on your Creator Store feed at your store link (e.g., planoly.store/yourhandle).
💡 Note: The post preview inside the composer may show fewer images than what appears on your live store page — this is just a preview rendering difference. Your published store page will display the full grid correctly.
Before You Begin: Link Your Social Feed to Creator Store
Before your scheduled posts can appear on your Creator Store, you'll need to connect your Instagram feed as a block on your store page. If you've already done this, just follow the steps above every time you post.
Step 1: Log into your account at planoly.com and navigate to your Workspaces. Find the workspace you want to connect and click the Creator Store icon (the storefront grid icon) in the Creator Store column.
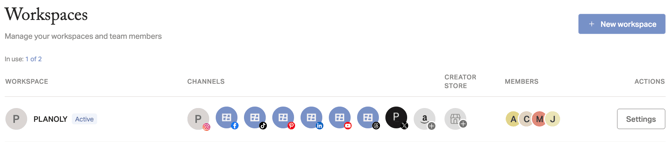
This will open your Creator Store directly — no separate login needed.
Step 2: In Creator Store, go to Store in the left sidebar and scroll down to tap + Add Block.
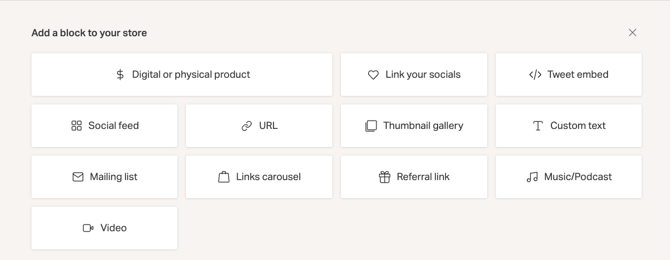
Step 3: Select Social Feed from the block options, then choose Instagram as your social channel.
Step 4: Your feed should sync automatically. If prompted, enter your Instagram login credentials to connect your account.
Step 5: Once connected, your recent Instagram posts will appear. Tap the images you'd like to feature on your store — selected posts will populate the preview on the right side of the screen.
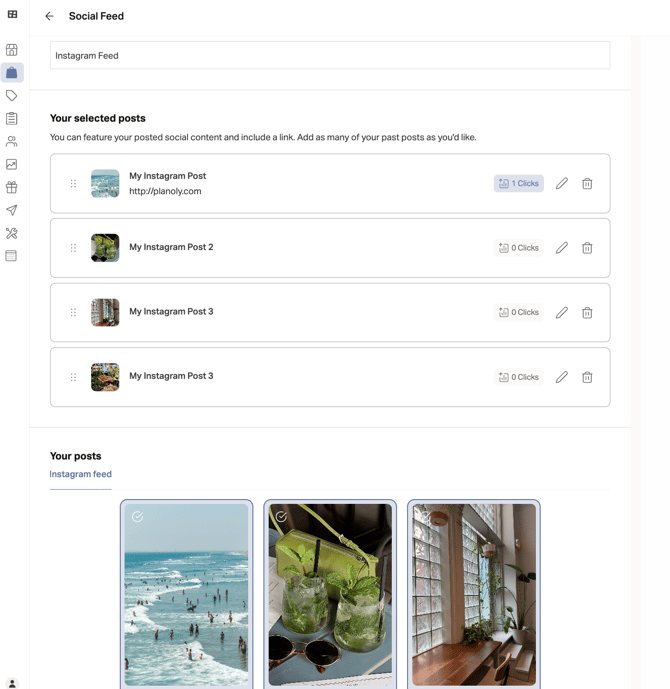
Step 6: You can update the Name of your feed section (e.g., "Instagram Feed") at the top of the page. When you're happy with your selection, scroll to the bottom and click Save.