How to Link and Auto-Post to Pinterest
Auto-posting to Pinterest is available in our Multi-Channel Workspace on both the web dashboard and mobile app! Link your Pinterest account today to manage everything in one place.
How to Link Pinterest
- Log into your Planoly account on web
- From the account switcher at the top, click on Add & Edit Social Connections to navigate to your Social Sets Manager page
- From the icons, click on the Pinterest icon to link your account
- Follow the steps to get your account linked by clicking on Give Access

5. Follow the flow to get linked
6. Once you are linked, you should see the screen below showing you successfully linked
7. From there, you can confirm it was linked by seeing it show up in your social icons at the top
How to Auto-Post to Pinterest from the Web Dashboard
- Log into your Planoly account on web
- Switch into your Multi-Channel workspace or create a new Multi-Channel workspace if you do not already have one set up
- Click on the calendar icon on the left and click on New Post
- Select Pinterest from the icons at the top, upload your media, choose the board you want to pin to, and add your caption, hashtags, etc.
- Add Pin Title, pin description, and pin URL
- Select the Auto-Post option from the dropdown, or select a date for your reminder notification

- Once complete, choose Schedule at the top
- Now, you should see your post scheduled on your grid!
Please Note: When adding a link to your pin, you must add https:// at the beginning of the link, otherwise it will not show up as an active link.
How to Auto-Post to Pinterest from the Mobile App
- Open up the Planoly mobile app and switch to your Multi-Channel Workspace
- Select New Post
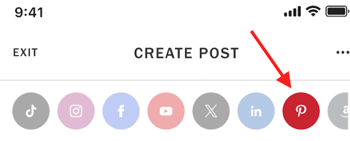
- Select Pinterest from the icons at the top and choose which type of post you want to upload it as

- Upload your media, choose the board you want to pin to, and add your caption, hashtags, etc.

- Add Pin Title, pin description, and pin URL
- Select either a date you want to auto-post this or select a date for your reminder notification
- Once complete, choose Schedule at the top
- Now, you should see your post scheduled on your grid!
What Are the Feature Limitations with Auto-Posting to Pinterest?
Included Features
- Ability to link Business or Personal accounts
-
Ability to post
-
Single Images
-
Single Videos
-
-
Ability to schedule for auto-post
- Will need to select a board to post to and include a Title, Description, and Link
Features Not Included
-
Product Tagging
-
Carousels
-
Business account functionality such as Ads
-
Posting to multiple boards
-
Creating a new board
Image Requirements
- All image files should be BMP, .JPEG, .PNG, .TIFF, .WEBP
- Maximum File Size: 20MB
- Maximum Character Count for the Title: 100
- Maximum Character Count for the Description: 500
- A board must be selected to schedule an image pin
Video Requirements
- Video API supports MP4 or QuickTime format
- File Types: .MP4 / .M4V / .MOV
- All video files should be H.264 or H.265 encoded (all profiles and levels are supported)
- Both mono and stereo streams are supported in the following formats: AAC, HE-AAC v1, HE-AAC v2, ALAC, FLAC, MP3, and WMA
- Videos should be between 4 seconds and 15 minutes
- Minimum Video File Size: 100MB
- Maximum Video File Size: 300MB
- Aspect Ratio: 1:1, 1:2, 2:3, 3:4, 4:5, 9:16
- Maximum Character Count for the Title: 100
- Maximum Character Count for the Description: 500
- A board must be selected to schedule a video pin