So what is Linkit?
Planoly's link-building feature allows users to link the posts featured on their Instagram feedback to any URL. You can curate a custom gallery of your Instagram posts and attach links to a brand’s website, blog article, or referral links. For the consumer, this makes discovering a product, and then purchasing it through an influencer or blogger’s social media account, easier and more efficient. Best of all, Linkit is a free feature available to all Planoly users.
Where can I access Linkit?
For all Planoly users, you can access Linkit immediately by heading to the top right of the navigation bar on the desktop in Instagram planner. You do not need to set up, upgrade, or add Linkit to your Planoly account. (Keep in mind, if you are a paid Planoly user and have upgraded to Sellit, Linkit is built into Sellit. This means you will not see a Linkit tab at the top navigation bar in your IG Planner).
How do I add the Links to my posts on Linkit?
To add a post to your grid gallery, start by clicking on “Linkit” at the top of your navigation bar in the Instagram Planner web dashboard. Next, select the Instagram post you want to add to your grid gallery and click “Add (1) to Store.” Then, hover over the left panel and click on the “Store” tab (the icon that looks like a store) to view your grid gallery at a glance. From there, click on the post you selected, click into the search bar labeled “enter the image redirect link,” and paste the URL you would like to associate with the post. Finally, click “Save.” Once that’s done, you’re all set!
How about Sellit?
Sellit helps you turn your social media followers into paying customers -- without the need for a website. It makes the most of your Instagram Bio, transforming a single link into a digital storefront. With Sellit, you can sell any physical product or service and transform it into a social storefront. Sellit gives you the ability to sell anything and everything from tangible products to courses and consultations, along with goods and services. If you can link it, you can Sellit!
How does Sellit work?
Sellit turns your Instagram grid into a shoppable gallery and helps you make the most of your link in bio across social platforms, letting followers shop your products and services in just one click. You can upload products using a CSV file or add them individually with details like images, titles, prices, and links, and choose to redirect visitors or use Sellit checkout. After adding an Instagram post, you can tag products or add a URL, and your updates will appear instantly. You can also feature up to three highlighted products or posts at the top of your store using drag and drop to help key content stand out.
How to setup your Sellit shop.
| 1. Log into your Planoly account on the Web Dashboard and go to your Instagram Planner | |
| 2. Click on the Sellit page at the top of your screen. | 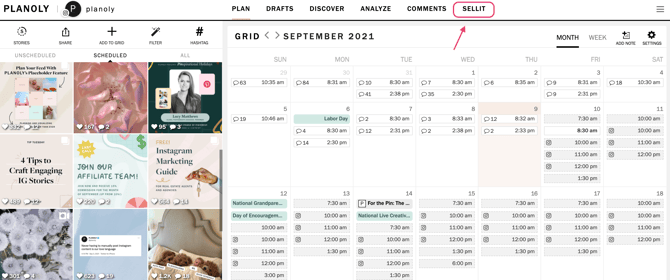 |
| 3. Hover over the left panel to view the four options: STORE tab, PRODUCTS tab, ANALYTICS tab, and PAYMENTS tab. | 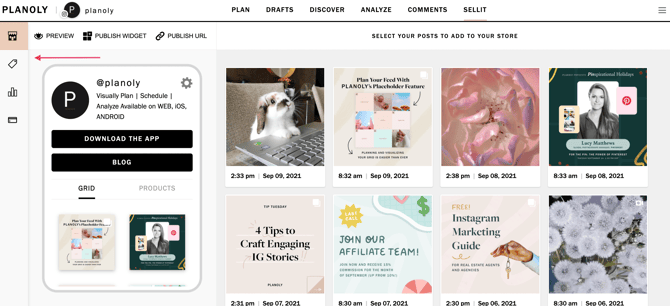 |
| 4. Click on +add description to add a description of your business. | 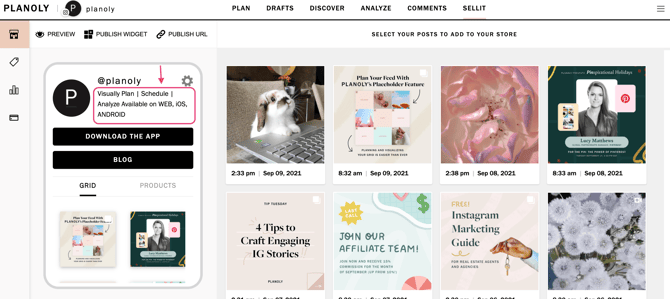 |
| 5. A new window will pop up to write a quick summary of your shop. | 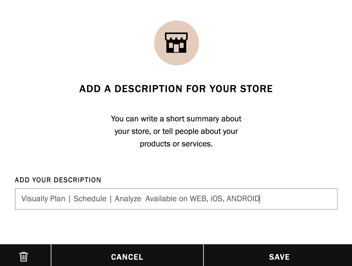 |
| 6. You can also customize Sellit by showcasing a featured section and selecting a button color. | 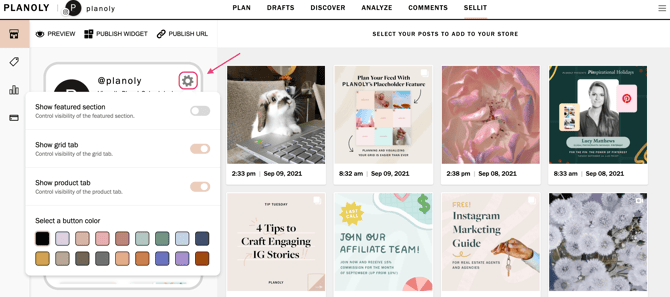 |
| 7. Click on ADD LINK, to customize the button name and include a URL for any website. |  |
| 8. Fill in the link details for the top 2 buttons. | 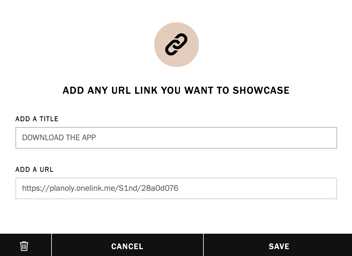 |
| 9. Add products & pricing from the price tag tab. | 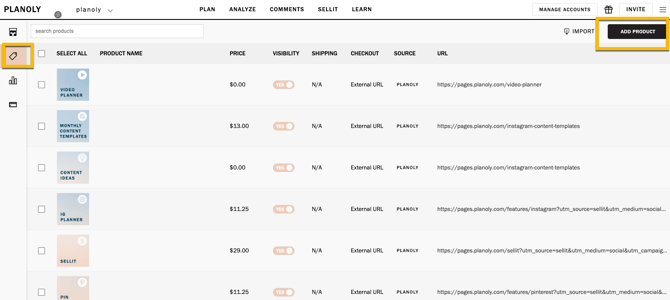 |
| 10. View performance from the analytics tab. | 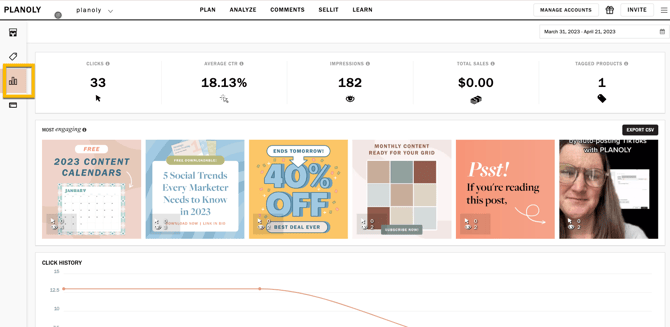 |
| 11. Set up Sellit payments. More info here. |
How to share your Sellit link.
To share your Sellit shop, start by going to your Sellit dashboard and clicking Publish URL, then publish your shop to make it public. Once it’s live, copy the URL link and paste it into any social media profile, including TikTok, Instagram, X (formerly Twitter), Pinterest, LinkedIn, YouTube, or Facebook. You can also share your link through email, text, or anywhere else a URL is supported.
How to setup Sellit payments.
- Log into your Planoly account on the web dashboard.
- Switch into your Instagram Planner.
- Tap on Sellit/Linkit Tab.
- Choose Products.
- Click the payments tab on the left side of your web dashboard screen in Sellit. Here, you’ll see a button to START ACCEPTING PAYMENTS TODAY!
- Click on Start accepting payments. By setting up with Stripe, your customers can directly check out with just one click.
- Acknowledge that you’ve read the Restricted and Prohibited goods and services list.
- Connect your Existing Account or Create a Brand New Account. This will only pop up after you have checked the box after reading the Restricted and Prohibited goods and services list.
- Follow through the Stripe account creation process to complete. You will be redirected to their website. You can also Add Shipping Settings and Tax Settings within this step.
Creating a Coupon in Sellit
1. Log into your Planoly account on the web dashboard
2. Switch into your Instagram Planner
3. Tap on Sellit/Linkit tab
4. Click on the Products tab
5. Click the payments tab on the left side of your screen on your web dashboard
6. Scroll to the section that says coupons

7. Click on Add coupon
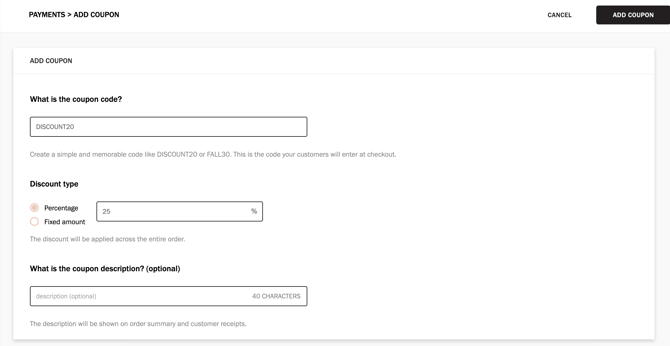
8. Fill out your coupon details. Coupon code and discount type are required fields
Planoly Pro Tip: Be sure to choose between a percentage discount or a fixed amount discount.
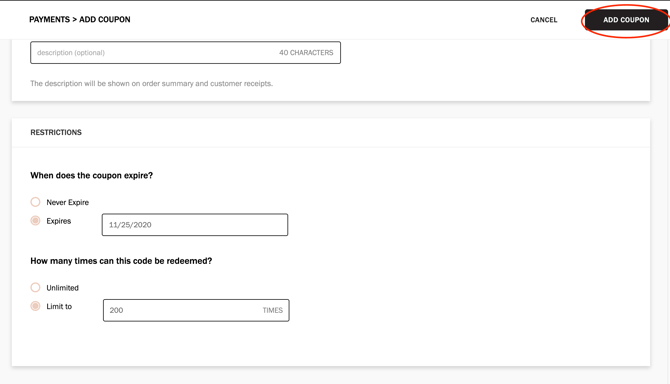
9. Select when you want the coupon to expire, and how many times it can be redeemed

10. Press add coupon in the top right
11. The coupon is now live on the payments page  12. Hover over the coupon to copy code, edit the description, or delete the coupon
Additional Resources: